
How to colorize black and white photos
Murphy family wedding, Ireland 1929. National Library of Ireland, no known restrictions.
.jpg)
To colorize a black and white photo, open it in UnblurApp and choose Colorize. The model identifies skin, clothing, foliage and sky as separate regions and colours each one, which is why the result looks photographed instead of tinted.
What the model is doing
Colorization is an educated guess made at scale. The model has studied millions of colour photographs alongside their greyscale versions, so it has learned which grey belongs to skin, which to denim, which to summer grass. Given a monochrome print it assigns each region the colour that fits.
This is why it handles a group portrait better than an early attempt with a paintbrush ever did. Six faces, four jackets and a lawn each get their own treatment instead of one wash across the frame.
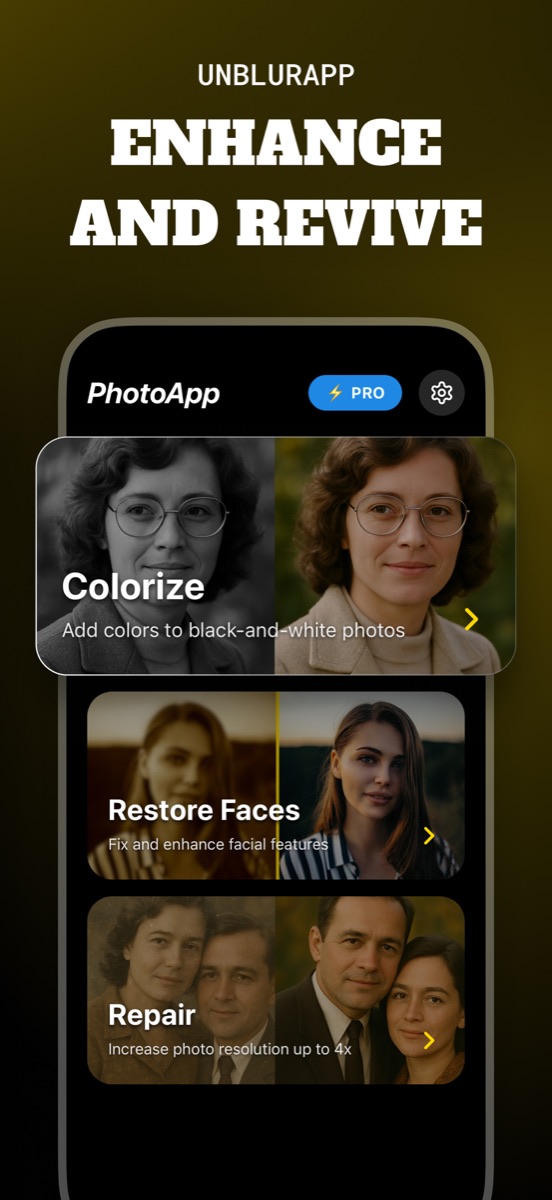
Colorize a photo in three taps
- Open Colorize
Pick the Colorize tool from the restoration tools list on the home screen.
- Choose the print
Select your scan or phone capture of the black and white photograph.
- Compare and save
A progress bar runs while the model works, then the result appears alongside the original.
If the print is also damaged or faded, run Repair first and Colorize second. Colour applied over a crack tends to make the crack more obvious, not less.
What it reliably gets wrong
Anything the model cannot infer from context, it invents. A dress that was emerald green may come back navy, because both render as the same grey. Eye colour is a coin flip. Military uniforms, sports kits and school colours are frequent casualties, and family members who remember the real colours notice within seconds.
Skin tones are handled well in most cases but can drift toward an average on underexposed prints. Foliage, sky and wood are the most reliable, since the range of plausible colours is narrow.
Keep the black and white version
A colorized photo is an interpretation. The monochrome print is the document. Archive both, and if you are sharing the coloured version with family, say that it was colorized. People treat old photos as evidence about what their relatives looked like, and a confident wrong colour quietly becomes family memory.
For prints headed to a frame, it is worth printing both. The black and white often holds up better at large sizes, and the colour version is the one people crowd around at a birthday.
Getting a better source scan
Colorization depends heavily on tonal range. A flat, faded scan gives the model fewer distinctions to work with, and the output looks washed out for the same reason the input did.
Photograph the print in soft daylight with no flash, keep the phone parallel to it, and avoid shooting through glass. If the print has yellowed with age, that cast is information the model will read as colour, so a Repair pass to normalise contrast before colorizing usually improves the result.
Questions people also ask
Is colorizing an old photo accurate?
Plausible is the right word for it, accurate is not. The model infers colours from context and gets skin, foliage and sky mostly right, while clothing and eye colour are frequently invented.
Can I colorize a sepia photo, not just black and white?
Yes. Sepia prints work the same way, and the tool reads the brown cast as tonal information instead of real colour.
Related guides
Turning an old photo into a new photo
Turn an old photo into a new one without losing what made it old. What to fix, what to leave alone, and how to revive old photos on your phone.
Read the guide →
How to restore old damaged photos
Repair damaged photos with cracks, scratches, tape marks and torn corners. How to handle a fragile print, capture it safely, and rebuild it with AI.
Read the guide →
How AI photo restoration works
How AI photo restoration rebuilds faded, blurry and damaged pictures, why the results are plausible rather than recovered, and when to trust them.
Read the guide →