
How to unblur a photo on your iPhone

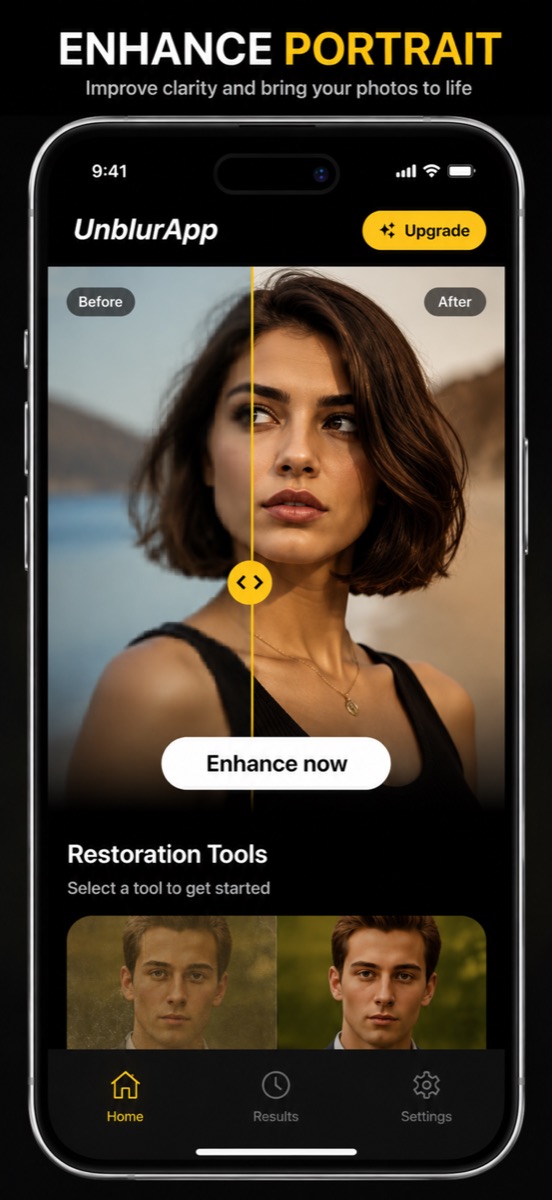
To unblur a photo on an iPhone, open UnblurApp, select the picture from your camera roll and tap Enhance now. The AI reconstructs the edges the camera missed and returns a sharp copy in under a minute, with the original left untouched in your library.
Why the photo went blurry in the first place
Blur has three common causes, and knowing which one you are looking at tells you whether the picture can be rescued. Motion blur smears in one direction, because either you or the subject moved while the shutter was open. Focus blur is even in every direction and often leaves something else in the frame perfectly sharp. Compression blur looks mushy and blocky, and comes from a file that has been resized and re-saved too many times on its way through a group chat.
Motion and focus blur both respond well, because the detail is still encoded in the file, just spread across neighbouring pixels. Heavy compression is the hard case: those details were thrown away by the encoder, so recovering them means generating new ones. That still works, it just belongs to the upscaler instead of the deblur pass.
Remove blur from a photo in three taps
- Pick the photo
Open the app and choose the blurry image from your camera roll. Portraits, pets and objects all work.
- Tap Enhance now
The AI analyses the frame and rebuilds edge detail. A progress bar shows how far along it is.
- Compare, then save
Drag the before and after slider across the result. If you like it, tap Save. The original is never overwritten.
The whole flow takes about a minute on a recent iPhone. There are no sliders to balance and no masks to paint, which is the point: most people with a blurry photo of their kid do not want to learn radius and threshold settings.
Which blurry pictures are worth trying
A useful test: can you tell what the subject is? If a human can identify a face, a sign or a building in the blur, the model has enough structure to work from. If the photo is a grey smear with no recognisable shapes, nothing will bring it back, and any tool that claims otherwise is inventing a picture instead of restoring yours.
Group shots taken indoors at night are usually recoverable. So are photos of a moving child, screenshots saved at low quality, and scans of prints that were slightly out of focus in 1994. Photos taken through a rain-covered window, or shots where the subject crossed the frame at speed, tend to come back only partly.
What about faces specifically
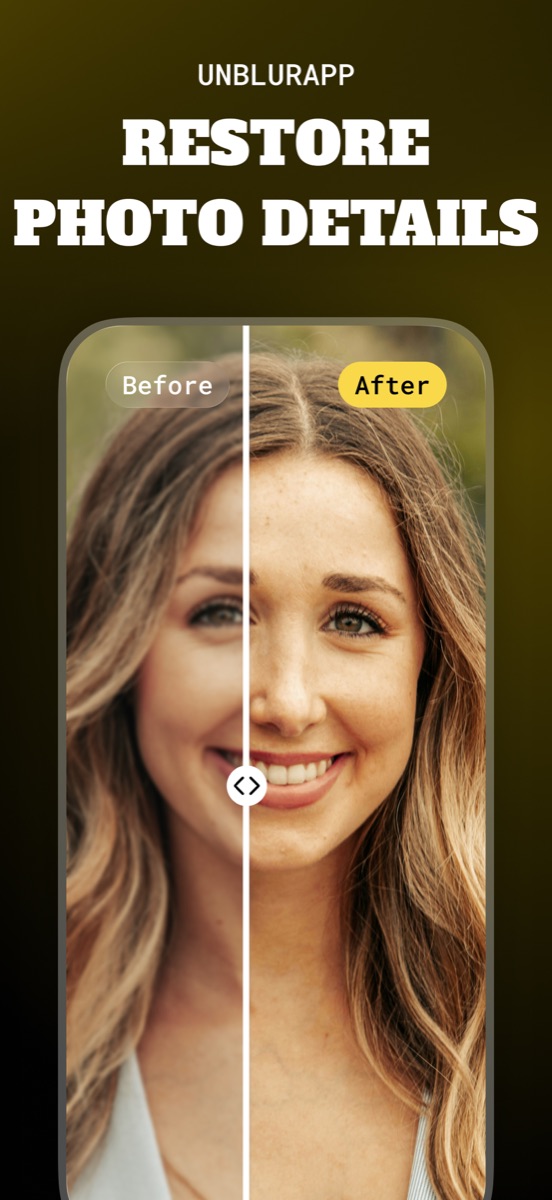
Faces get their own treatment. A general sharpening pass applied to a soft portrait produces the waxy, plastic look you have seen on badly upscaled images, because the model has no idea which smudges are eyelashes and which are noise. Restore Faces runs a model trained on portraits, so eyes, mouths and hair boundaries are rebuilt with the structure a face actually has.
If your picture is mainly a person, run the face tool and not the general enhance. The difference is most obvious around the eyes.
Doing it on a computer instead
Photoshop has Shake Reduction, Lightroom has texture and clarity, and both give you fine control if you already know them. They also expect you to know what a deconvolution kernel does before the result stops looking crunchy. For a single photo you want to text to your sister, an app that does one thing in one tap is the faster path.
Free web tools handle simple cases, but most cap resolution on the free tier and hand back a watermarked 800-pixel file. Check the export size before you spend twenty minutes on a photo you cannot save at full quality.
Questions people also ask
Can you unblur a photo that was already blurry when it was taken?
Usually, yes. Blur from camera shake or a missed focus point still carries the underlying detail in the file, spread over more pixels than it should be. The model pulls it back together.
Does unblurring change the original file?
No. The enhanced version saves as a new image in your camera roll, so you keep both and can go back if you prefer the original.
Related guides

How to unblur a photo on Android
Unblur a photo on Android. What Samsung Gallery and Google Photos can already do for free, where they stop, and what to use when they do.
Read the guide →
Remove blur from a photo online, free
Fix a blurry photo online free. Which blurry pictures can be saved, where free tools cap you, and how to get a full-resolution result from your phone.
Read the guide →
How to unblur a face in a photo
Face unblur that keeps the person recognisable. Why portraits need a dedicated model, how AI face restoration works, and the limits worth knowing.
Read the guide →