
How to restore old photos

Familie Regout-Laloux, c. 1921. Public domain via Wikimedia Commons.

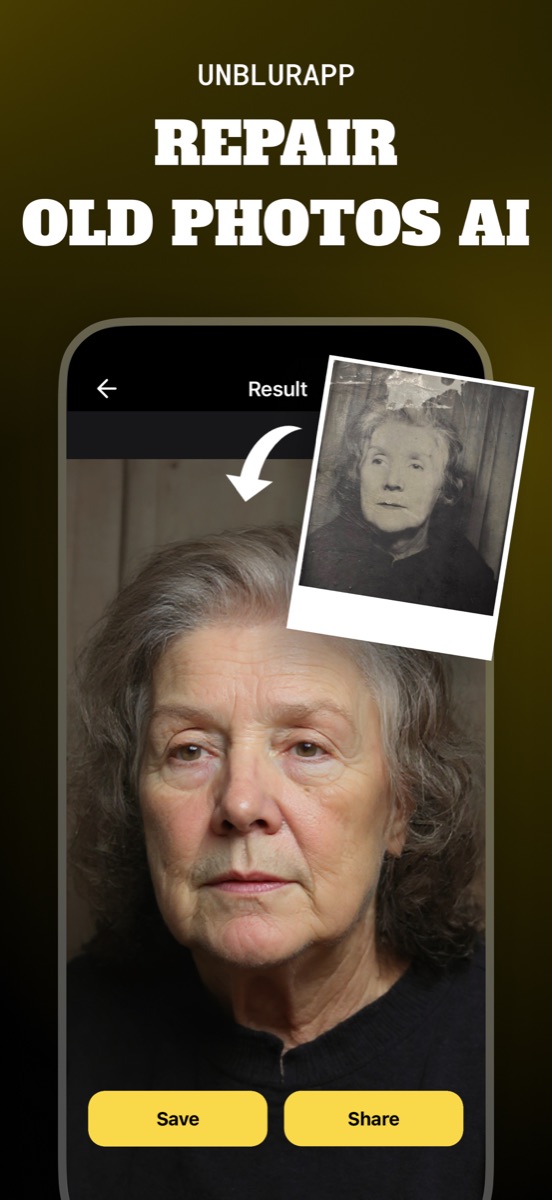
Restoring an old photo takes two steps: get a clean digital capture of the print, then run it through AI restoration. Photograph the print flat in soft daylight, open it in UnblurApp, and the Repair tool rebuilds faded areas, cracks and lost detail at up to 4x the resolution.
Capture the print properly first
- Remove glass and lay the print flat
Glass creates reflections that the restorer will treat as part of the picture.
- Use soft indirect daylight
A window on an overcast day beats any lamp. No flash.
- Shoot straight on, filling the frame
Keep the phone parallel to the print so the edges stay rectangular.
- Run Repair in the app
Open the capture in UnblurApp and choose Repair. The result exports at up to 4x resolution.
This step decides everything that follows. The AI can only rebuild detail that survives into your digital copy, so a bad capture puts a ceiling on the result no software can lift.
Take the photo out of the frame if there is glass over it. Lay it flat on a plain surface near a window, ideally on an overcast day, and turn off your flash. Keep the phone parallel to the print instead of angling it, fill most of the frame, and tap the screen to focus before you shoot. If the print is glossy and you can see yourself in it, tilt it a few degrees until the reflection slides off.
What AI restoration actually fixes
Four kinds of damage respond well. Fading, where decades of light have flattened the contrast into grey. Physical damage: cracks, creases, tape residue and torn corners. Softness, from a lens that was never sharp or a print made from a worn negative. And resolution, since a 1970s snapshot holds far less detail than a phone screen expects.
Repair addresses all four in one pass, then upscales. On a badly cracked studio portrait the difference is dramatic, because the model has seen enough faces to know what belongs where a crack ran across a cheek.
Where it goes wrong
The model reconstructs plausible detail, which is not the same as recovering the truth. On a face that has degraded past recognition it will produce a person who looks slightly like your grandmother rather than exactly like her. Family members who knew the subject often spot this immediately.
Keep the scan. Always keep the scan. The restored version is a viewing copy, and the untouched capture stays the record. For genealogy work, archive both and note which is which.
One more habit: restore a copy, never the only file you have. Storage is cheap and a lost original is not recoverable.
Making old photos look new without making them look fake
Restraint reads better than maximum enhancement. Grain, a slightly warm cast and shallow depth of field are part of why a 1968 photo looks like 1968. Strip all of that out and you get an image that feels rendered instead of remembered.
If the app offers a choice, prefer the result that keeps some texture. When you are printing for a frame, that texture also hides the small reconstruction artefacts that a screen at 200% would show.
Restoring old photos in bulk
Work in batches by condition, not by date. Do all the faded-but-intact prints in one sitting, all the physically damaged ones in another. The tool settings that suit one group rarely suit the other, and grouping saves you from re-deciding on every photo.
Name files as you go. A folder of two hundred images called IMG_4471 through IMG_4670 is a project you will abandon. Even a rough label like "1963-wedding-03" pays for itself the first time someone asks you for a specific picture.
Questions people also ask
Do I need a flatbed scanner to restore old photos?
No. A phone photo taken flat in soft daylight is enough for most prints. A scanner gives you more resolution on small or highly detailed originals, but it is not the difference between a good and a bad result.
How long does restoring one photo take?
The processing itself finishes in about a minute. Capturing the print carefully takes longer than the software does, which is why the capture step is worth the attention.
Related guides

Turning an old photo into a new photo
Turn an old photo into a new one without losing what made it old. What to fix, what to leave alone, and how to revive old photos on your phone.
Read the guide →
How to restore old damaged photos
Repair damaged photos with cracks, scratches, tape marks and torn corners. How to handle a fragile print, capture it safely, and rebuild it with AI.
Read the guide →
How AI photo restoration works
How AI photo restoration rebuilds faded, blurry and damaged pictures, why the results are plausible rather than recovered, and when to trust them.
Read the guide →